I’ve made beads in one form or another most of my life. The media changes over time, so do the purposes for the beads. I don’t generally make beads for the sake of making beads. I make them to incorporate into other projects.
I’ve made beads out of paper, polymer clay, stoneware, wood, glass, and other stuff I don’t remember. These days, it’s mostly wood and glass, mostly in support of my pottery projects.
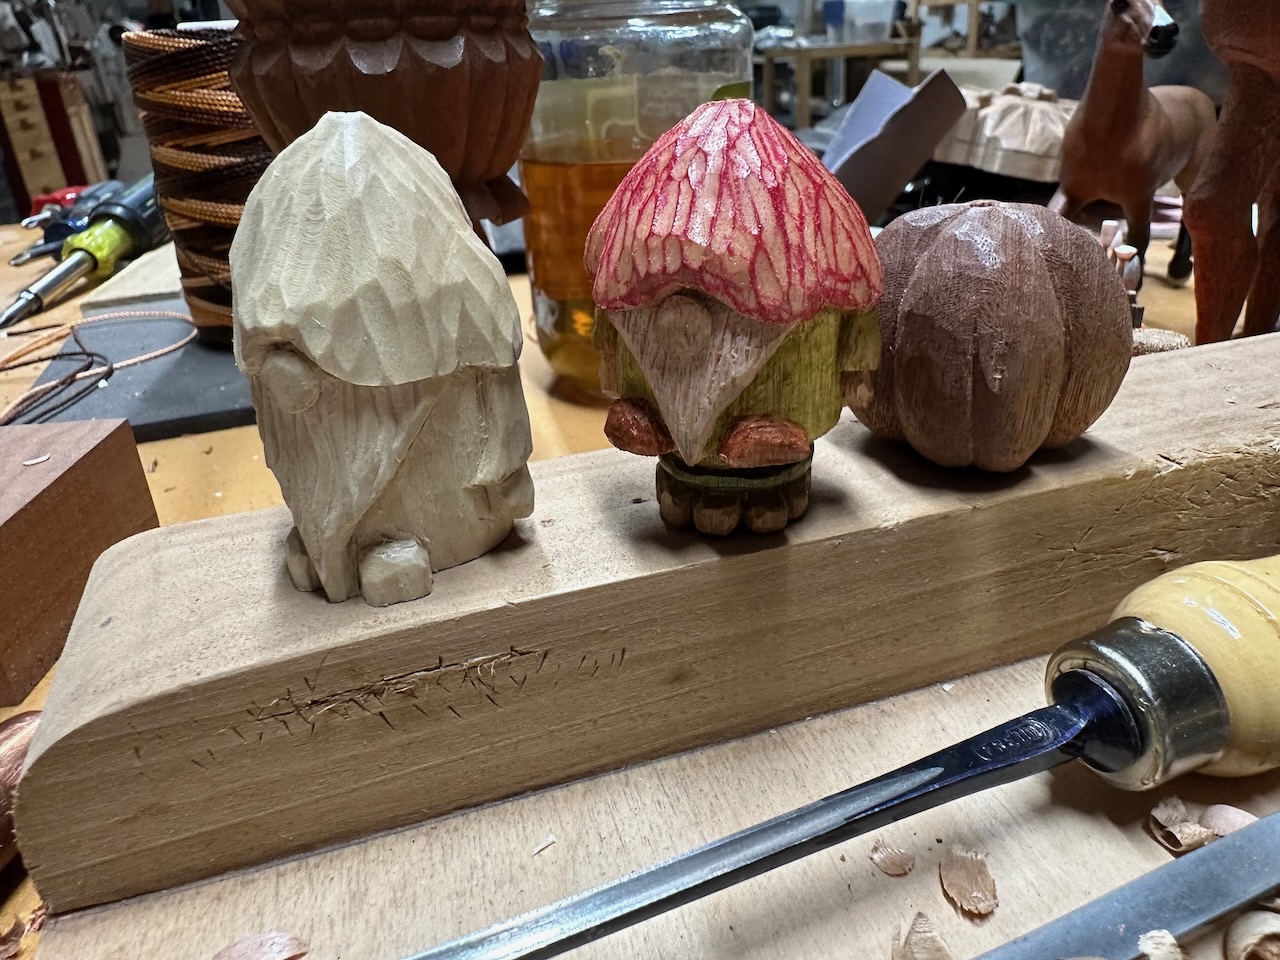
I make large wooden beads for bell clangers, light pulls and zipper pulls. Most are made on the lathe although lately I’ve been hand carving a few. It’s been a humiliating experience involving blood in all the wrong places. (The reason for band-aids in the wood shop isn’t always about keeping the wound clean. It’s more about keeping the work blood-free.) My first hand-carved beads aren’t necessarily what you’d call pretty. Pretty is overrated. I aim for interesting. I sometimes miss the mark. Maybe more than sometimes.
Here are my lessons learned for hand carving beads:
Beads are functional.
Unlike a lot of other woodcarvings, beads get used for stuff. Designs should take this into consideration. If bits of the carving would fall off if the bead is knocked around, it doesn’t belong on the bead. Beads often take a lot of abuse. Simple, shallow designs are often best.
Make sure your work is firmly anchored.
Mounting beads in a lathe is great for this if you have a locking headstock. Often I will turn the bead to its rough shape on the lathe, then carve details onto the surface. Once this is complete, I can cut it off for further finishing. (I frequently do the finish on the lathe as well for things like beads.) If you’ve a lathe, this is the way to go.
When a lathe is not available, I’ve made a little jig in which the bead blank mounts onto a drywall screw mounted on a thin board (mine is about 3/8 inch thick). You want the screw to be able to turn freely through the mounting board so you can sock your bead blank tightly against it. The drywall screws (inch and a quarter, #10, I think) worked well for a bead blank drilled with a 1/8 inch hole. For larger/smaller bead holes, you’ll have to adjust the screw size.
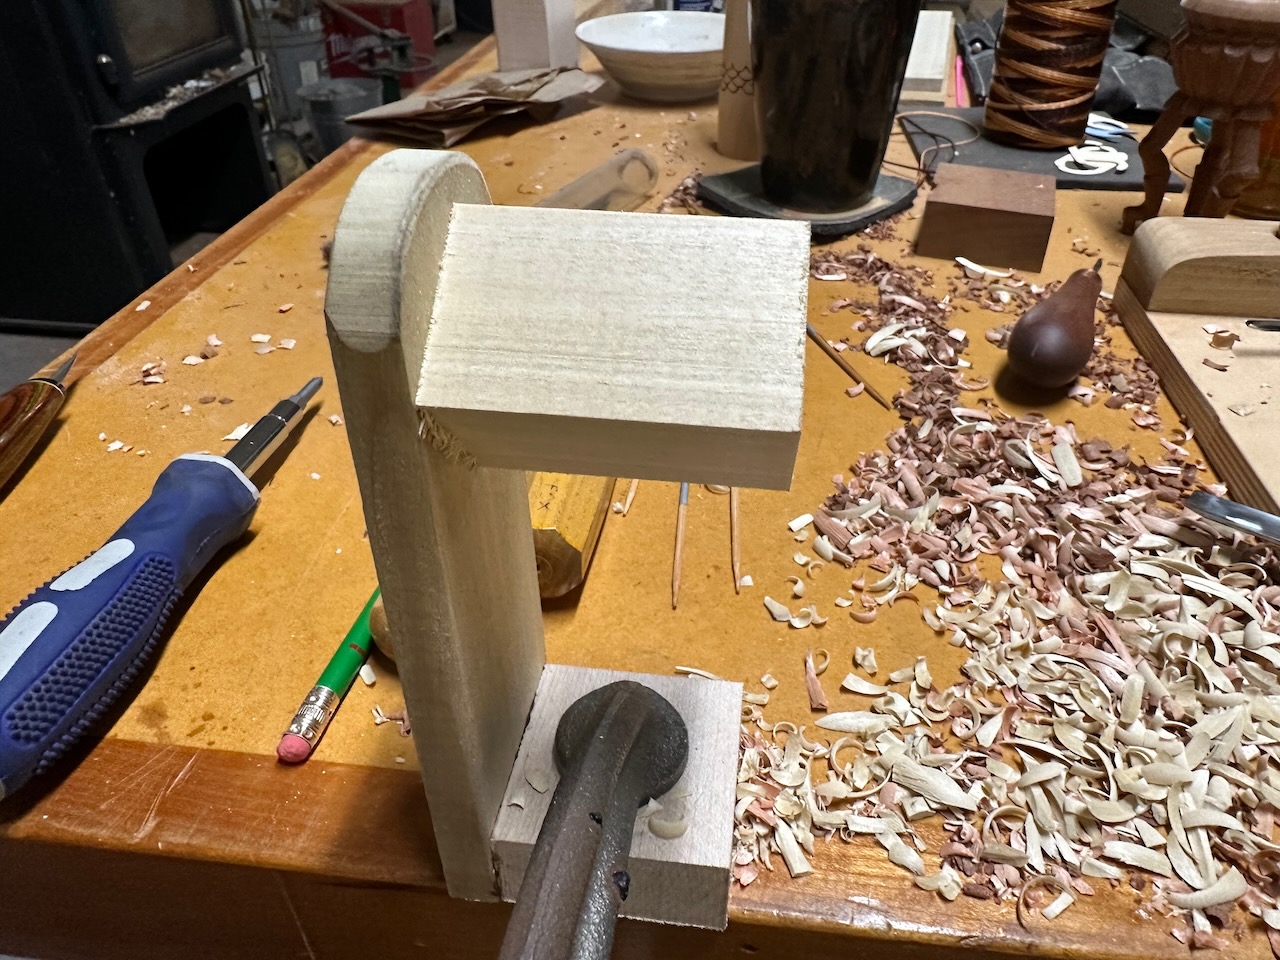 BEAD BLANK MOUNTED TO A HOLDING JIG (VIA DRYWALL SCREW). PHOTO BY AUTHOR.
If your bead is shorter than the length of the screw, you’ll want a spacer. When making the spacer, drill the hole larger so that it can spin freely on the screw. Only the bead should screw on tightly. Before attempting to make small beads, be sure you are comfortable doing larger beads without cutting yourself. Going tiny is best left for pros with machines.
Make sure your tools are sharp.
I can’t emphasize this enough. More accidental cuts happen from working with dull knives than with sharp ones. (This applies in the kitchen as well.)
It takes more force to make a cut with a dull tool than with a sharp one. This leads to less control, which leads to the knife going someplace it is not wanted. Take the time to learn how to sharpen your knives and gouges, if you haven’t done so.
Use appropriate wood.
Basswood and White Pine are among the easiest woods to carve. Poplar also works well. If you plan on painting your bead once carved, definitely choose a wood for its carve-ability, not for its looks. Look for even grain, no knots, branch inclusions or other defects. Test the wood with your knife. If it feels hard to carve, it probably will be.
Mahogany, Walnut and Butternut are pretty woods that are not too difficult to carve. But be aware that two boards, even from the same tree, can be vastly different to work with.
If you want to use pretty wood, understand first that it is often more difficult to carve. Good tool control and sharpness is critical to keeping blood off the work.
Be aware of the grain.
A piece of wood can be likened to a bundle of straws. The easiest way to cut said bundle, is lengthwise, starting from the middle, traveling down toward either end. Cutting across (cross grain) or trying to peel up from the end isn’t going to be successful. You can do it, when you absolutely have to, but be sure your knife is blindingly sharp or the quality of the cut will be less than satisfactory.
You should be able to feel whether you are cutting with the grain or against it. The knife cuts smoothly with the grain, leaving a sheen on the wood left behind. You’ll feel more resistance going against the grain (cross-grain is the toughest), and the quality of your cut will generally be poorer. In just about every design, there will be some detail that has to be done in a less than ideal way, but if you think about what you are doing, those times will be fewer than you imagine.
When preparing bead blanks, your bead hole needs to be aligned to go along the grain, not against it. Cross grain is generally going to be less attractive, plus the wood will be weaker and more likely to break. Who wants to go to all the trouble of hand carving a bead only to have it fall apart?
Start by drilling the hole
The hole is going to serve two purposes. First, once carved, it’s how you’ll attach your bead to your creation. Secondly, while creating the bead, it’s going to giving you a mounting point to support your work.
Making the hole first establishes where you want it to be in relation to the finished bead. It is easier to carve the bead around the hole than to attempt to drill it accurately once the bead is carved. This is, in part, because once carved, there’s often no easy way to safely hold the bead in order to drill it.
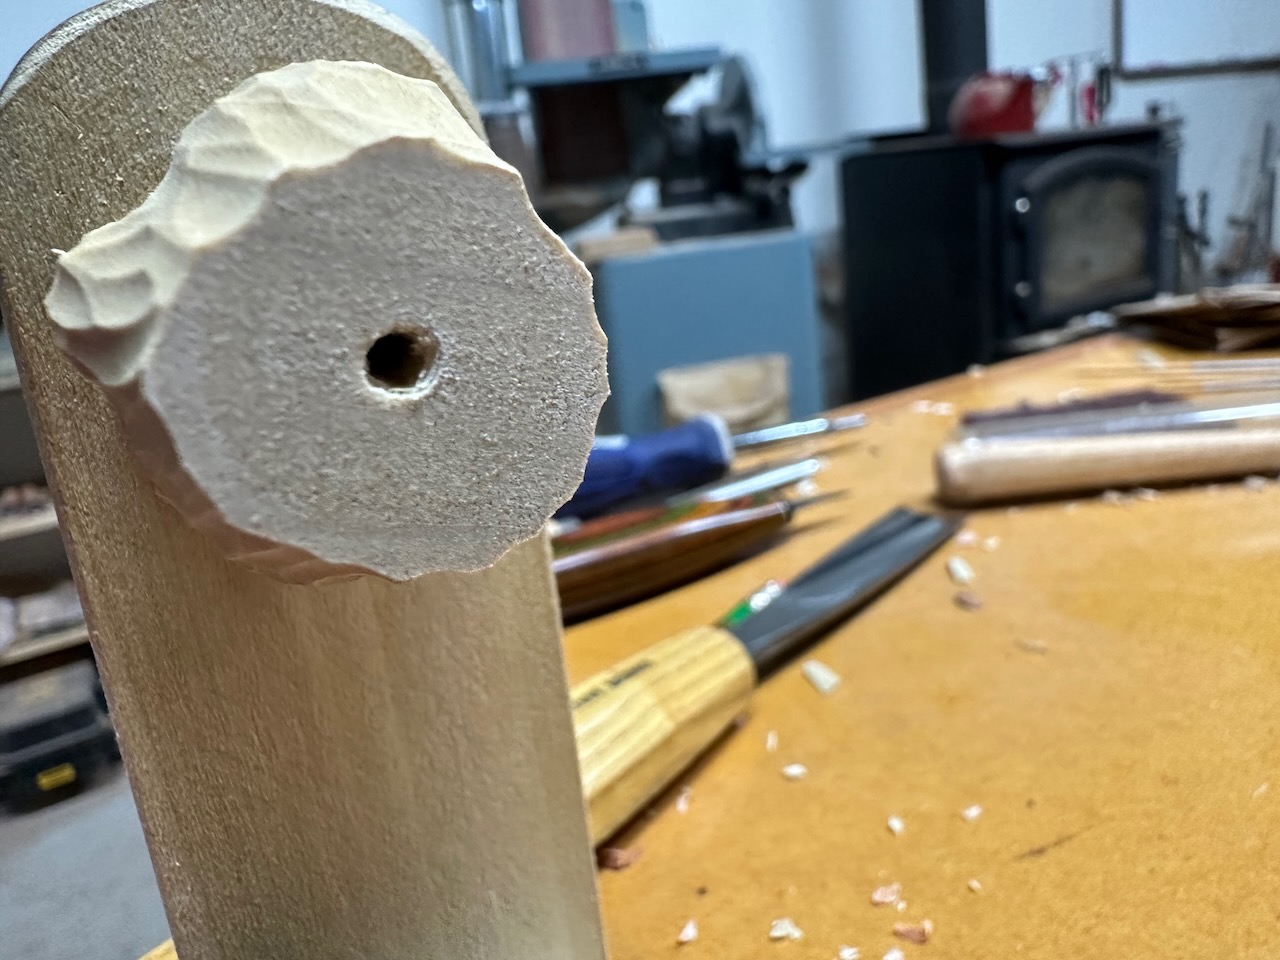 BEAD BLANK (PARTLY CARVED) SHOWING HOLE DRILLED THROUGH CENTER. PHOTO BY AUTHOR.
I use the drill press to drill the beads. It’s easiest for me to get a hole that is centered in the blank and straight.
The size of the hole has to match the screw you use for the mounting jig. If the project calls for a larger or smaller hole, change the mounting screw. Once carved, you can smooth the hole with a small file, which may enlarge it slightly, so keep that in mind.
Carving the bead
Keep in mind the overall design as you carve.
Work in stages: first round off the corners as necessary, then adjust the overall shape, and finally add decorative touches.
Turn your work often. Don’t go too far in any one area before bringing the other sides in line.
Don’t carve into the jig. Rather, work on the outer end of the bead, then reverse it on the jig to do the other side.
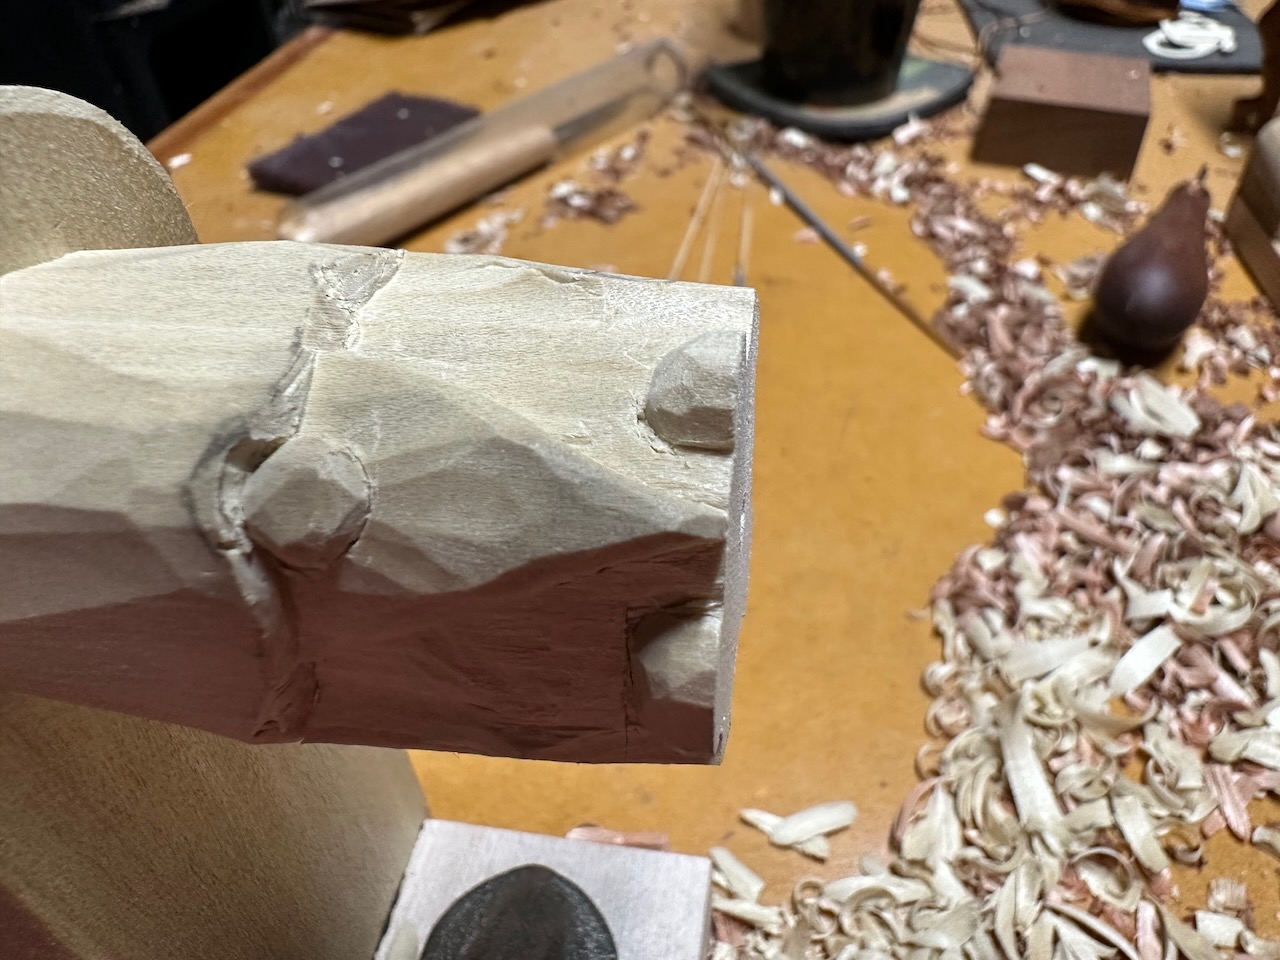 PARTLY-CARVED BEAD. WORK IS BEING DONE ON THE SIDE NOT TOUCHING THE JIG. PHOTO BY AUTHOR.
Your screw should not stick out of the end of the bead. If it does, add a spacer between the bead and the jig. You don’t want to carve into the screw.
Finishing the bead
I’m not a fan of sanding. When at all possible I prefer to leave a tool mark finish on my carved work. That said, smooth areas may need sanding to look right.
When sanding, work through a progression of grits. How high you go has to do with what kind of finish you intend to apply.
For no finish, you’ll want to go furthest with the sanding, probably up to 600 grit, possibly farther if you want the bead to shine. Note this type of finish isn’t appropriate for all woods. I would only do it on a reasonably hard wood with a tight grain.
For an oil based finished, you will probably want to go somewhere north of 300 grit, although that again depends on the wood and the type of oil you are using.
Depending on the kind of paint, if going that route, I would probably not sand much beyond 180 grit. You need some texture for the paint (or a film type finish) to hold onto. If you’re using something like a water color and are worried about the grain raising, go ahead and take it to 240 or so. If you don’t sand, you probably won’t have much problem with the grain raising.
You can pretty much use any technique you’d like on wooden beads. Do recognize that if you use something like markers to decorate the beads (which is a lot of fun), the color may not be permanent. They are permanent enough for me, and are easy to use. I also enjoy using watercolor pencils. Once I am finished with the color decorating, I typically apply a shellac finish.
 BEAD DECORATED WITH WATERCOLOR PENCILS AND FINISHED WITH ONE COAT OF SHELLAC. PHOTO BY AUTHOR.
For the shellac finish, I typically mount the bead on a bamboo skewer, then dip it into the shellac. It usually takes at least two coats, but for more shine, dip more. With the larger beads, I need to be careful not to glue the skewer into the bead hole with the shellac. If you make sure the bead will slide (not too easily, of course) before dipping, you should avoid that problem.